A great brisket starts with the cut. Look for a “Full Packer Brisket” (12–14 lbs).
The Trim: Cold meat is easier to cut. Trim the hard “deckle” fat, but leave about 1/4 inch (6mm) of the fat cap. This fat will “render” (melt) and baste the meat from the inside for 12 hours.
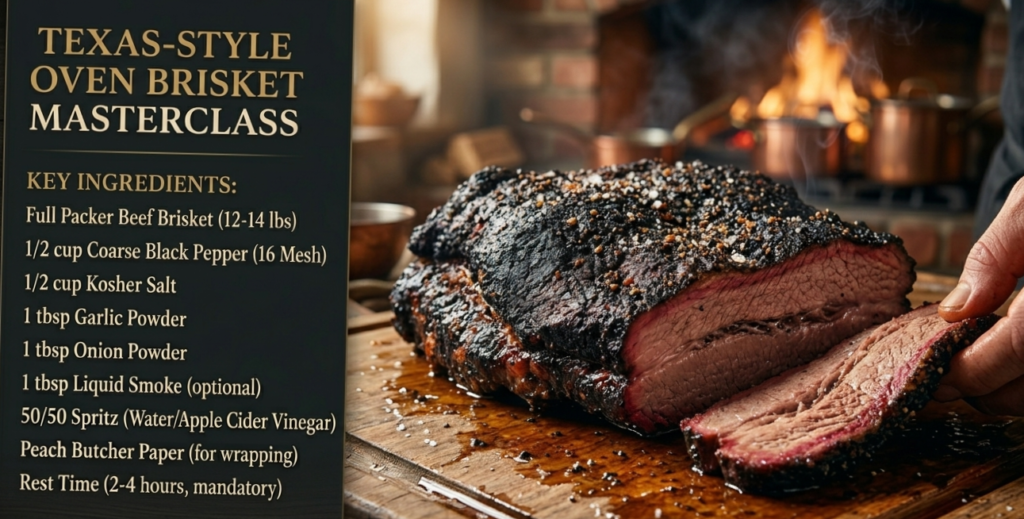
The Binder: Apply a very thin layer of Yellow Mustard. Don’t worry, you won’t taste it—it simply acts as a “glue” for your spices.
Phase 2: The “Dalmatian” Rub
In Texas, we let the beef speak for itself. Mix these in a shaker:
1/2 cup 16-mesh Coarse Black Pepper (The secret to a crunchy bark).
1/2 cup Kosher Salt.
1 tbsp Garlic Powder.
1 tbsp Onion Powder.
Coating: Heavily coat the meat until it looks like it’s covered in sand. Do not skim on the edges!
Phase 3: The Engineering of Heat (The Cook)
Stage A: Building the Bark (5–6 Hours)
Preheat your oven to 225°F (107°C).
Place the brisket on a wire rack inside a large roasting pan, Fat Side Up.
The Smoke Hack: If you don’t have a smoker, add a few drops of high-quality Liquid Smoke to a spray bottle filled with 50/50 Apple Cider Vinegar and water.
Every 90 minutes, “spritz” the dry spots of the meat to keep the surface cool and help the bark develop.
Stage B: The Texas Crutch (The Wrap)
Once the internal temperature hits 165°F (74°C) and the crust is dark and “set” (doesn’t rub off when touched):
Remove the meat and wrap it tightly in Peach Butcher Paper (or heavy-duty foil). Butcher paper is superior because it lets the meat breathe while holding in the juices, keeping the crust crunchy.
Place it back in the oven.
Stage C: The Finish
Continue cooking until the internal temperature reaches 203°F (95°C).
The Probe Test: Insert a toothpick or thermometer probe. It should slide in and out like it’s going into warm butter. If there is any resistance, keep it in longer.
Phase 4: The Golden Rule (The 3-Hour Rest)
This is where 90% of people fail. If you slice a brisket immediately, the steam escapes and the meat turns into “pot roast.”
Wrap the brisket (still in its paper) in two thick towels.
Place it inside an empty, dry Cooler (Ice Box).
Let it rest for a minimum of 3 hours (up to 5 hours). This allows the muscle fibers to relax and reabsorb all those liquid gold juices.
Phase 5: The Cinematic Slice
To get those perfect social media shots:
Find the Grain: Always slice against the grain. The “Flat” and the “Point” have grains running in different directions.
The Pencil Test: A perfect slice should be exactly as thick as a standard pencil.
The Pull Test: Pick up a slice by one end. It should stretch and then break cleanly under its own weight with a gentle tug.
Pro-Tip for your Website:
”Low and slow isn’t just a cooking method; it’s a test of patience. The reward is a piece of beef so tender you can cut it with a plastic spoon.”