
Here are the instructions to achieve the perfectly fried chicken, with a focus on replicating the ideal look of piece C (golden, craggy perfection).
The most common method for this is “Strut” Style or Buttermilk Fried Chicken Tenders.
The Secret to Success
To get the craggy, crispy texture of C, you must use the double-dip method and control your oil temperature.
Ingredients
1. For the Chicken & Marinade
- 1 lb (approx. 500g) Chicken Breasts, cut into long tenders or “strips.”
- 1 cup Buttermilk (This is crucial; it tenderizes the meat).
- 1 large Egg, beaten.
- 1 tsp Salt, 1/2 tsp Black Pepper.
2. For the Flour Dredge (The Coating)
- 2 cups All-Purpose Flour.
- 1/2 cup Cornstarch (This makes it extra crispy).
- 1 tsp Baking Powder (This helps create a light, bubbly crust).
- Seasoning Blend: 1 tbsp Salt, 1 tbsp Paprika (for that C/D color), 1 tsp Garlic Powder, 1 tsp Onion Powder, 1/2 tsp Cayenne Pepper (optional for heat).
3. For Frying
- Neutral oil for frying (Peanut oil, vegetable oil, or canola work best).
Instructions
Step 1: The Marinade (Marinate)
In a large bowl, whisk together the buttermilk, beaten egg, salt, and pepper. Place the chicken tenders into the buttermilk mixture, ensuring they are fully submerged. Cover and refrigerate for at least 4 hours, but preferably overnight. This step is essential for the tender inside.
Step 2: The Double Dip (The Crunch)
In a large, shallow dish, whisk together the flour, cornstarch, baking powder, and the entire seasoning blend. This is your “dredge.”
To create the craggy texture of Piece C:
- First Dip: Take a piece of chicken from the buttermilk mixture, letting the excess drip off, and coat it thoroughly in the seasoned flour dredge.
- The Secret Tip: Dip that flour-coated piece back briefly (1-2 seconds) into the buttermilk, then immediately return it to the flour for a second, heavier coating.
- The Technique: Instead of pressing the flour flat onto the chicken, “scrunch” the chicken lightly in the flour. Then, shake the chicken piece firmly to remove loose flour. This shaking action is what creates the irregular, crispy flakes you see in example C.
Step 3: The Heat (Fry)
- Heat your oil in a Dutch oven or deep skillet to 350°F (175°C). Use a thermometer; this is the key difference between B, C, and E.
- Optimal Timing (for C and D): Fry for 5–7 minutes. If your pieces are thick, it may take 7. The chicken should have an internal temperature of 165°F (74°C).
Step 4: The Rest (Drain)
Do not drain on paper towels! This traps steam and makes the chicken soggy (which looks like A). Instead, place the hot fried chicken on a wire cooling rack set over a baking sheet. This allows air to circulate, keeping the chicken crispy on all sides. Garnish with a sprinkle of flaky salt while hot.
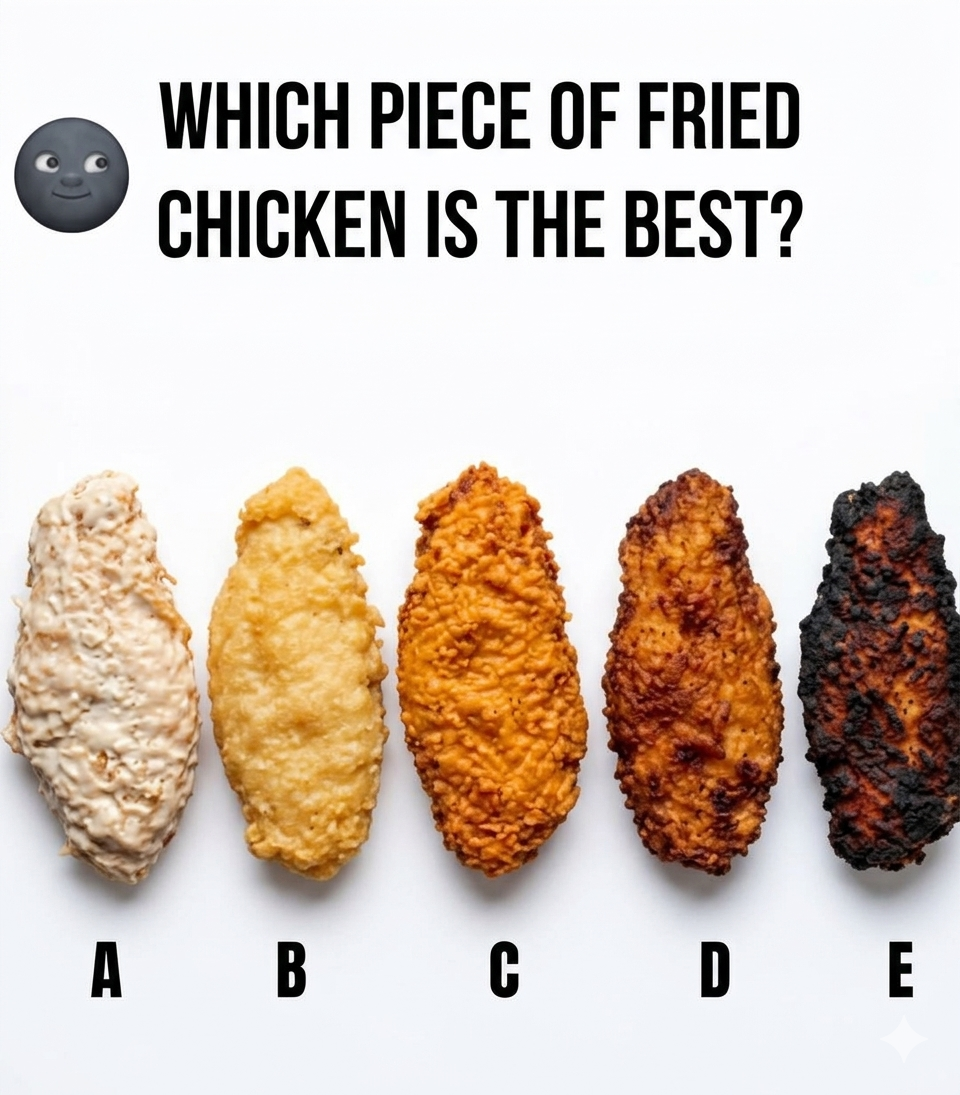
A Breakdown of the Results (as seen in the image):
- A: Under-fired / Cold Oil. The coating is pale and likely soggy.
- B: Properly Cooked, but Plain. Smooth crust, not enough craggy texture.
- C: The Masterpiece. The perfect oil temp for the perfect amount of time, resulting in that classic golden, flaky crunch.
- D: Deep Gold / Extra Crispy. This is usually achieved by frying slightly longer or slightly higher oil temps. It’s often preferred for a richer flavor.
- E: Overcooked / Burnt. The oil was too hot or it was fried too long.
